
The Grandeur of Garlic
This amazing member of the onion family has a long history in human culture with fingers in the culinary, medicinal, and even magical realms. It’s been used as a potent healer for centuries, and its tantalizing flavor has earned it a place in cuisine across the globe. As diverse as it is popular, garlic flavors range from mild, sweet and mellow to hot and spicy. Varieties come in big, bulky heads to smaller, delicate bulbs, wrapped in silvery white to pink or brilliant purple streaks. So much more than the frequently bland bulbs in the supermarket, this fascinating crop is simple to grow and very rewarding.
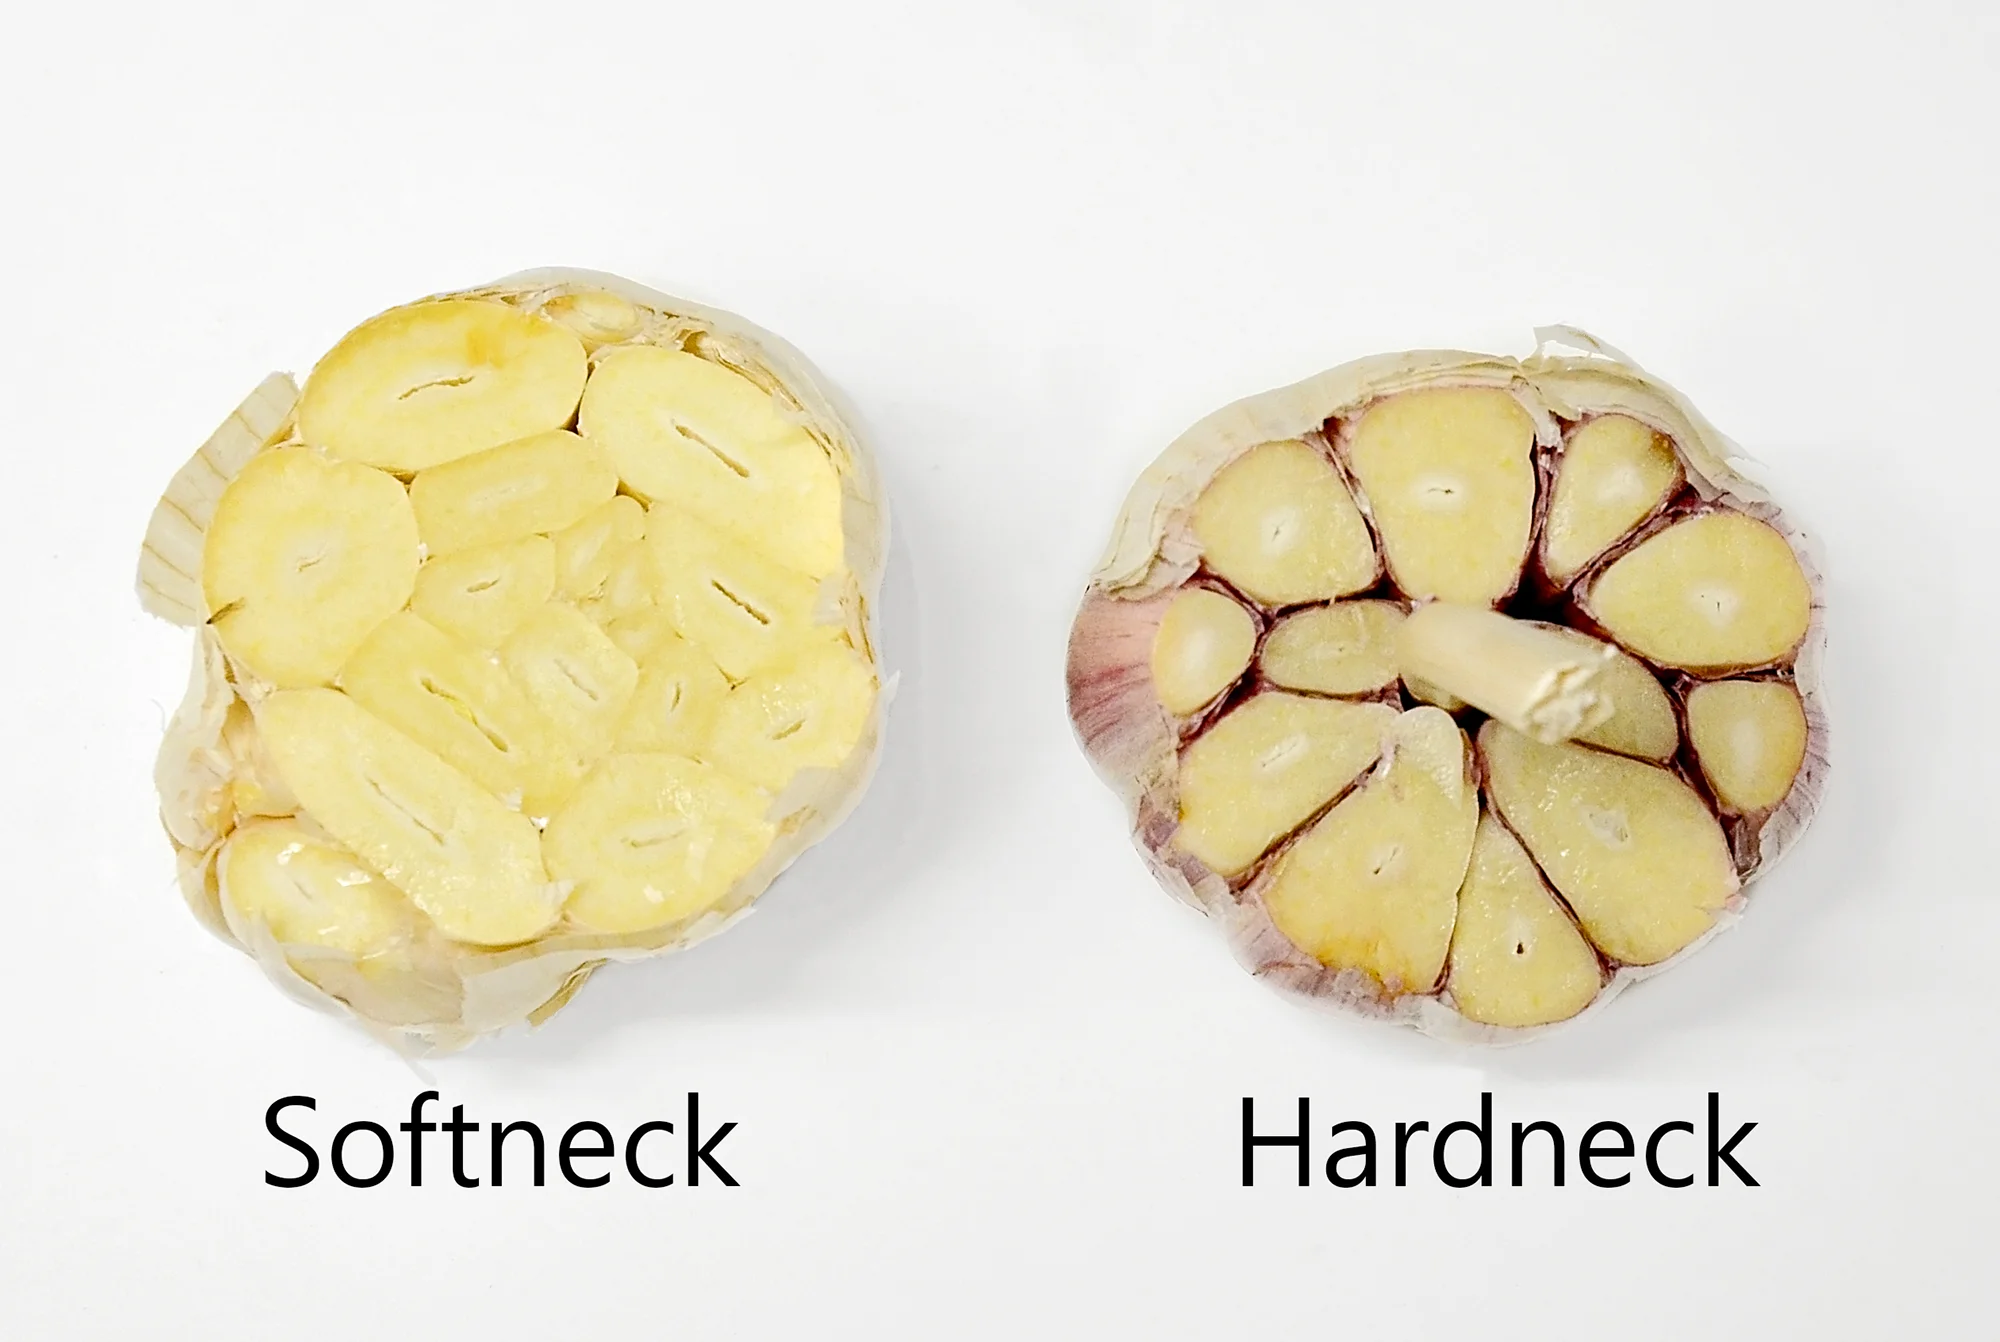
Garlic is divided into two main types: hardneck and softneck. The main differentiation comes in the structure of the bulbs. Hardneck varieties tend to have a single ring of big cloves surrounding a stiff central core. Softneck varieties have multiple layers of cloves with the largest on the outside and progressively smaller cloves deeper toward the center of the heads. Typically hardnecks have a brighter flavor than softnecks, but they don’t have as long a shelf life as softnecks. Consider choosing some of each type, so you’ll have both strong flavor profiles and good storability within your harvests.
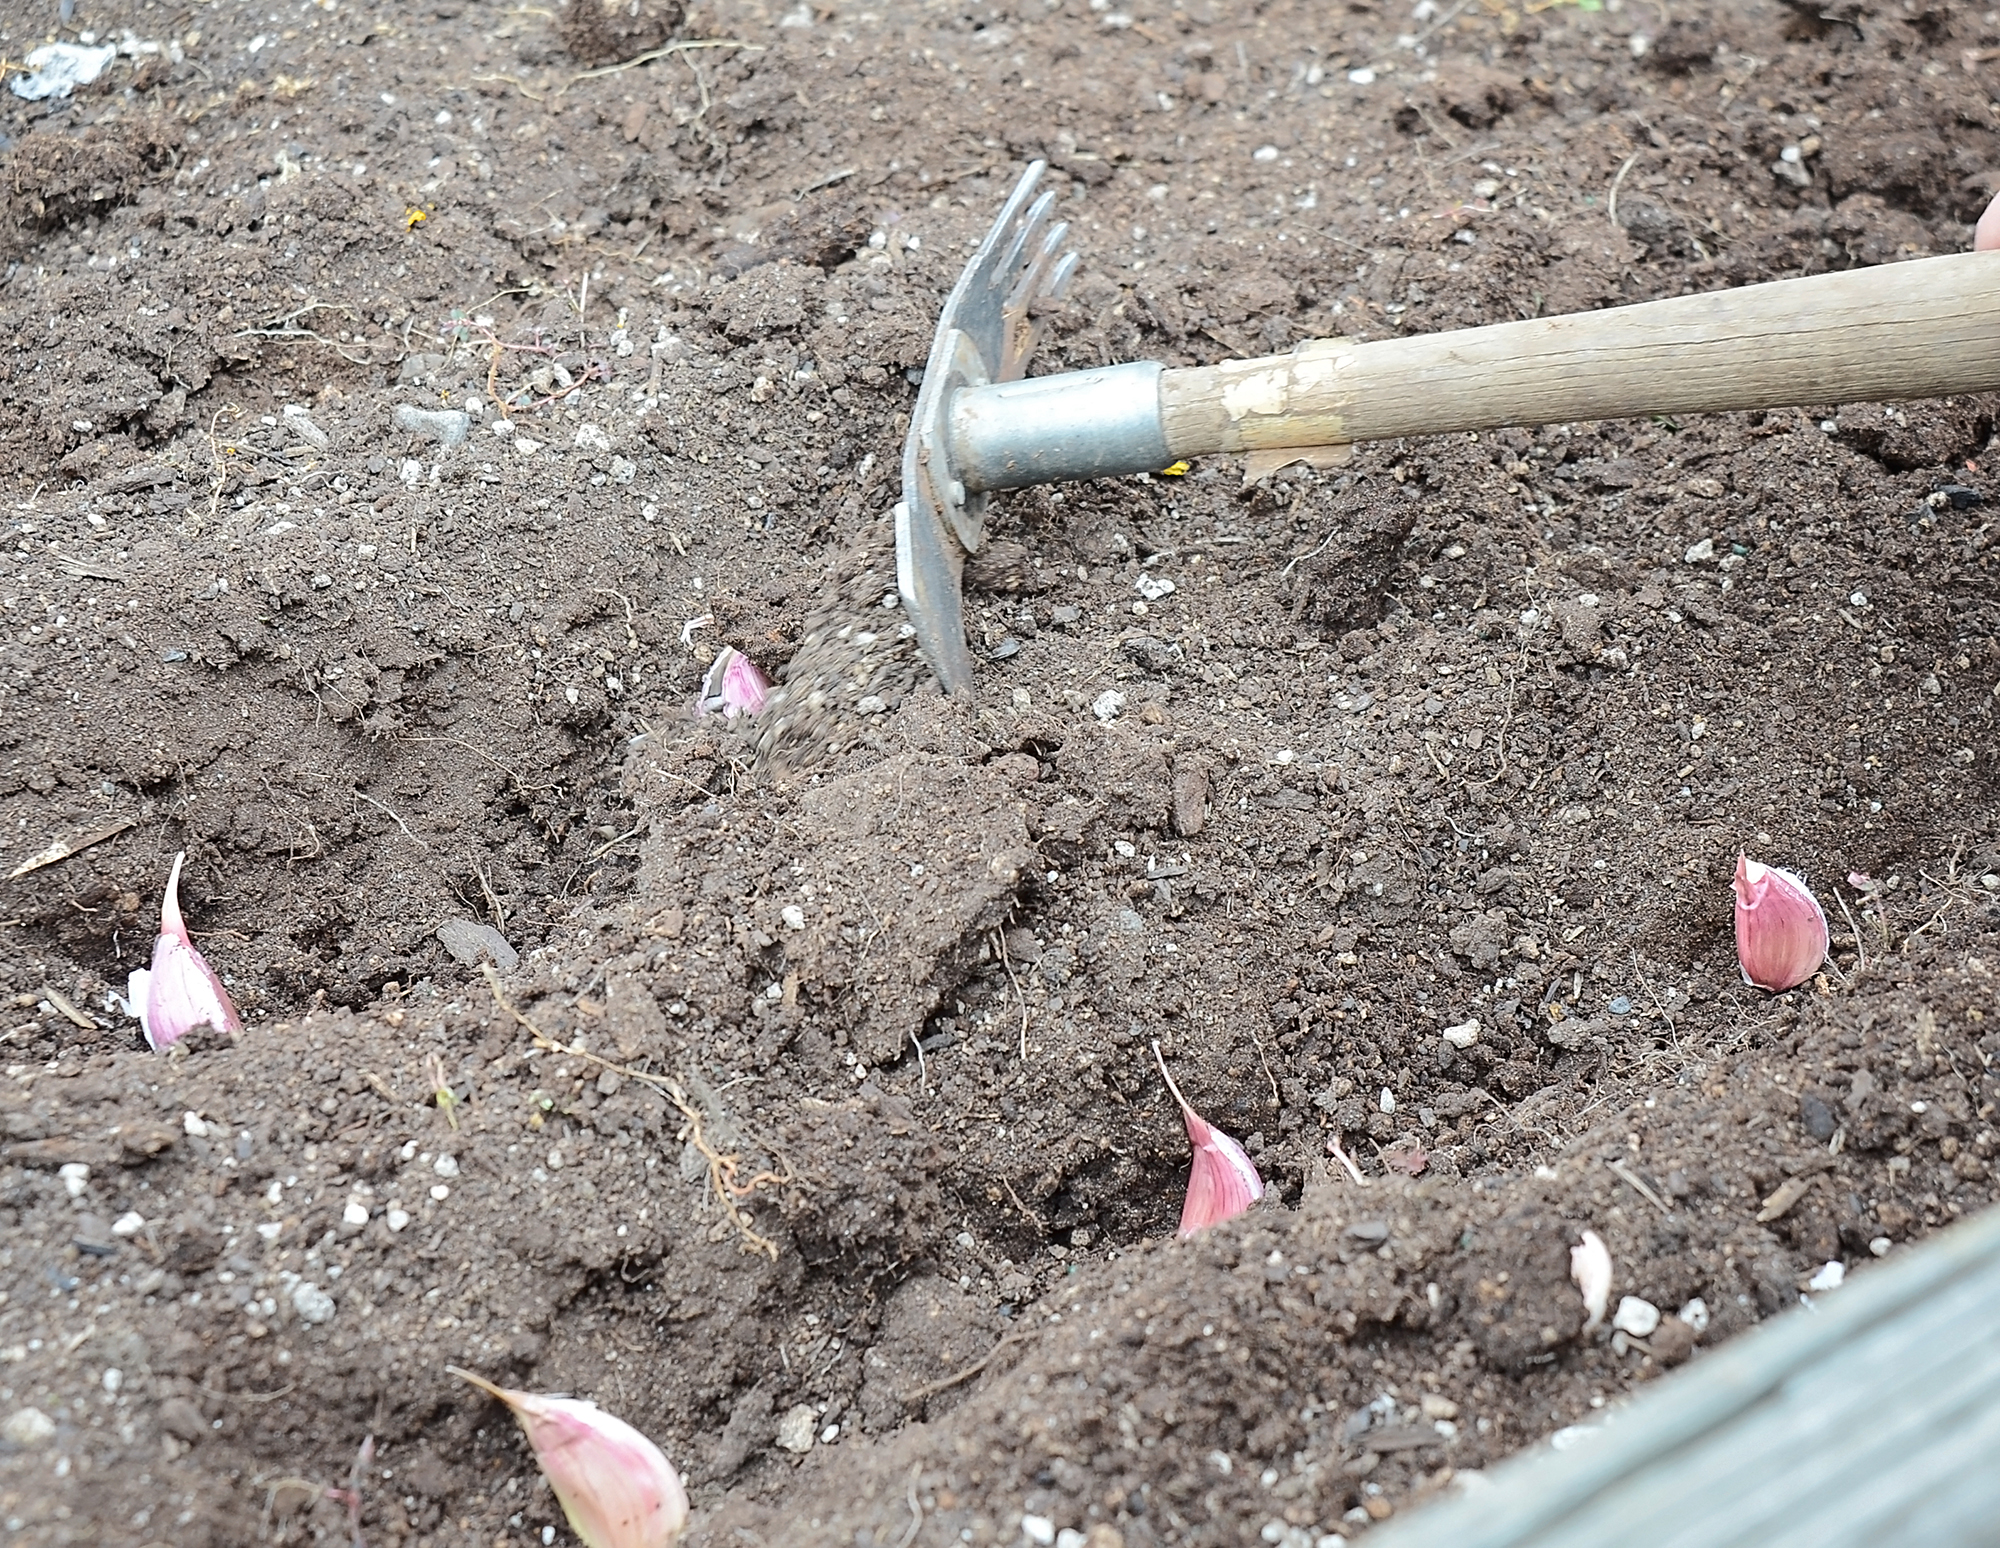
An exceptionally cold-hardy plant, we recommend putting garlic in the ground in fall (6-8 weeks before the ground freezes). Separate the head into individual cloves, leaving their protective wrapping on. Plant the cloves pointy side up, 1-2 inches deep, and 6-8 inches apart. Keep in mind the size of the finished heads, and give each clove at least twice that spacing between it and its neighboring clove. Each clove you plant will produce a full head at harvest time. Garlic works well in rows or planted in a grid, filling a bed, wide row or swath, or even in containers.

Depending on the variety and your garden’s conditions, your garlic may sprout soon after planting, or it may wait until spring to emerge. Don’t panic if you see your plants sending up shoots; trust their wisdom! They’ll grow a bit, and then sit tight through the coldest months. Either way, the cloves will be busy below the soil’s surface all winter establishing their root systems. Once spring arrives and the plants begin to grow in earnest, give them a dose of high nitrogen fertilizer to feed the foliar growth. We recommend blood meal, a composted high nitrogen manure, or our Age Old Grow formula. The stronger, more robust the upper part of the plant, the more energy it will be able to put into the bulb.
If you’ve planted a hardneck variety, you’ll see the plants throw a long, stiff stem partway through the season. This stem will develop a curlicue top, called a scape. The scape is the closest thing to a flower that garlic produces, although it is botanically not a true flower. If left to grow, the scape will open and produce small, garlicy nuggets called bulbils. These bulbils can be planted and will develop into garlic plants, but we recommend cutting off the scapes as soon as they appear, because they are robbing the plant of energy that could be going into the bulb. Chop up the scapes and add them to salad, stir-fries, sandwiches, or anything you’d like a hint of fresh garlic in. If you want to experiment with propagating your garlic from bulbils, or if you want to use the bulbils in cooking (they’re pretty powerful), you can allow one or two plants to ‘bloom’.

Garlic scapes
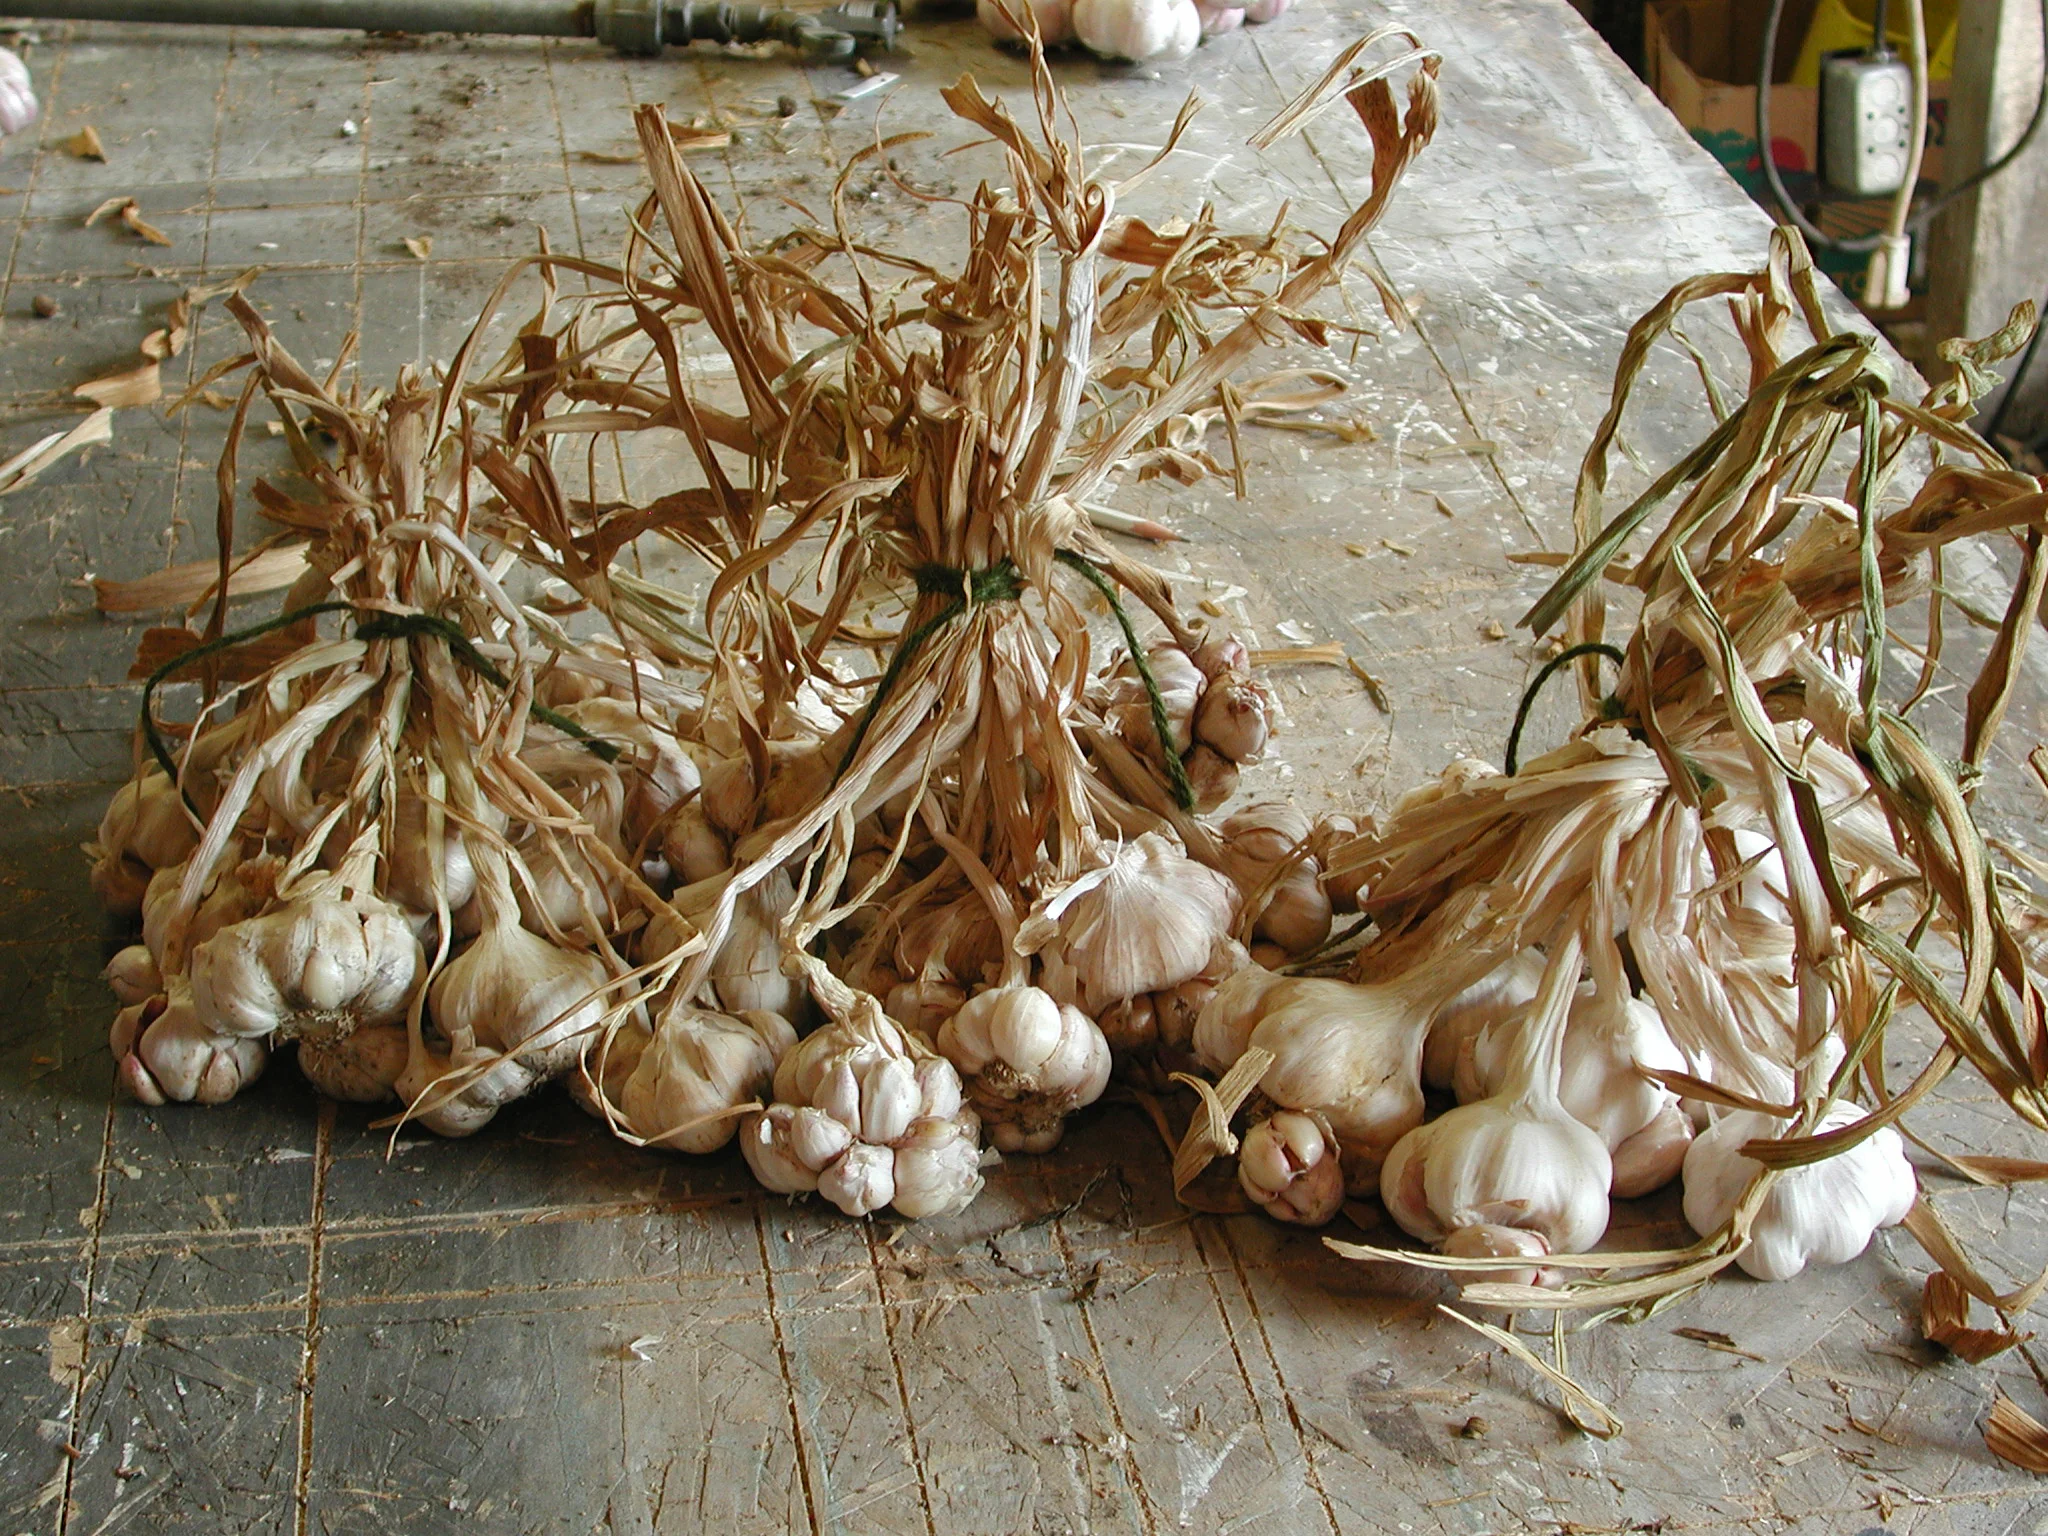
The plants will tell you when they’re ready to be harvested. The foliage begins to die down with the outermost leaves fading first. When just 3-4 leaves are green on the plants, it’s time to pull them. Bundle the plants together, tying their leaves in a bunch, and hang them in a shady, well-ventilated location for a few weeks to cure. After curing, you can cut the heads from the foliage and store them in mesh bags or keep the leaves on softneck varieties and braid them.
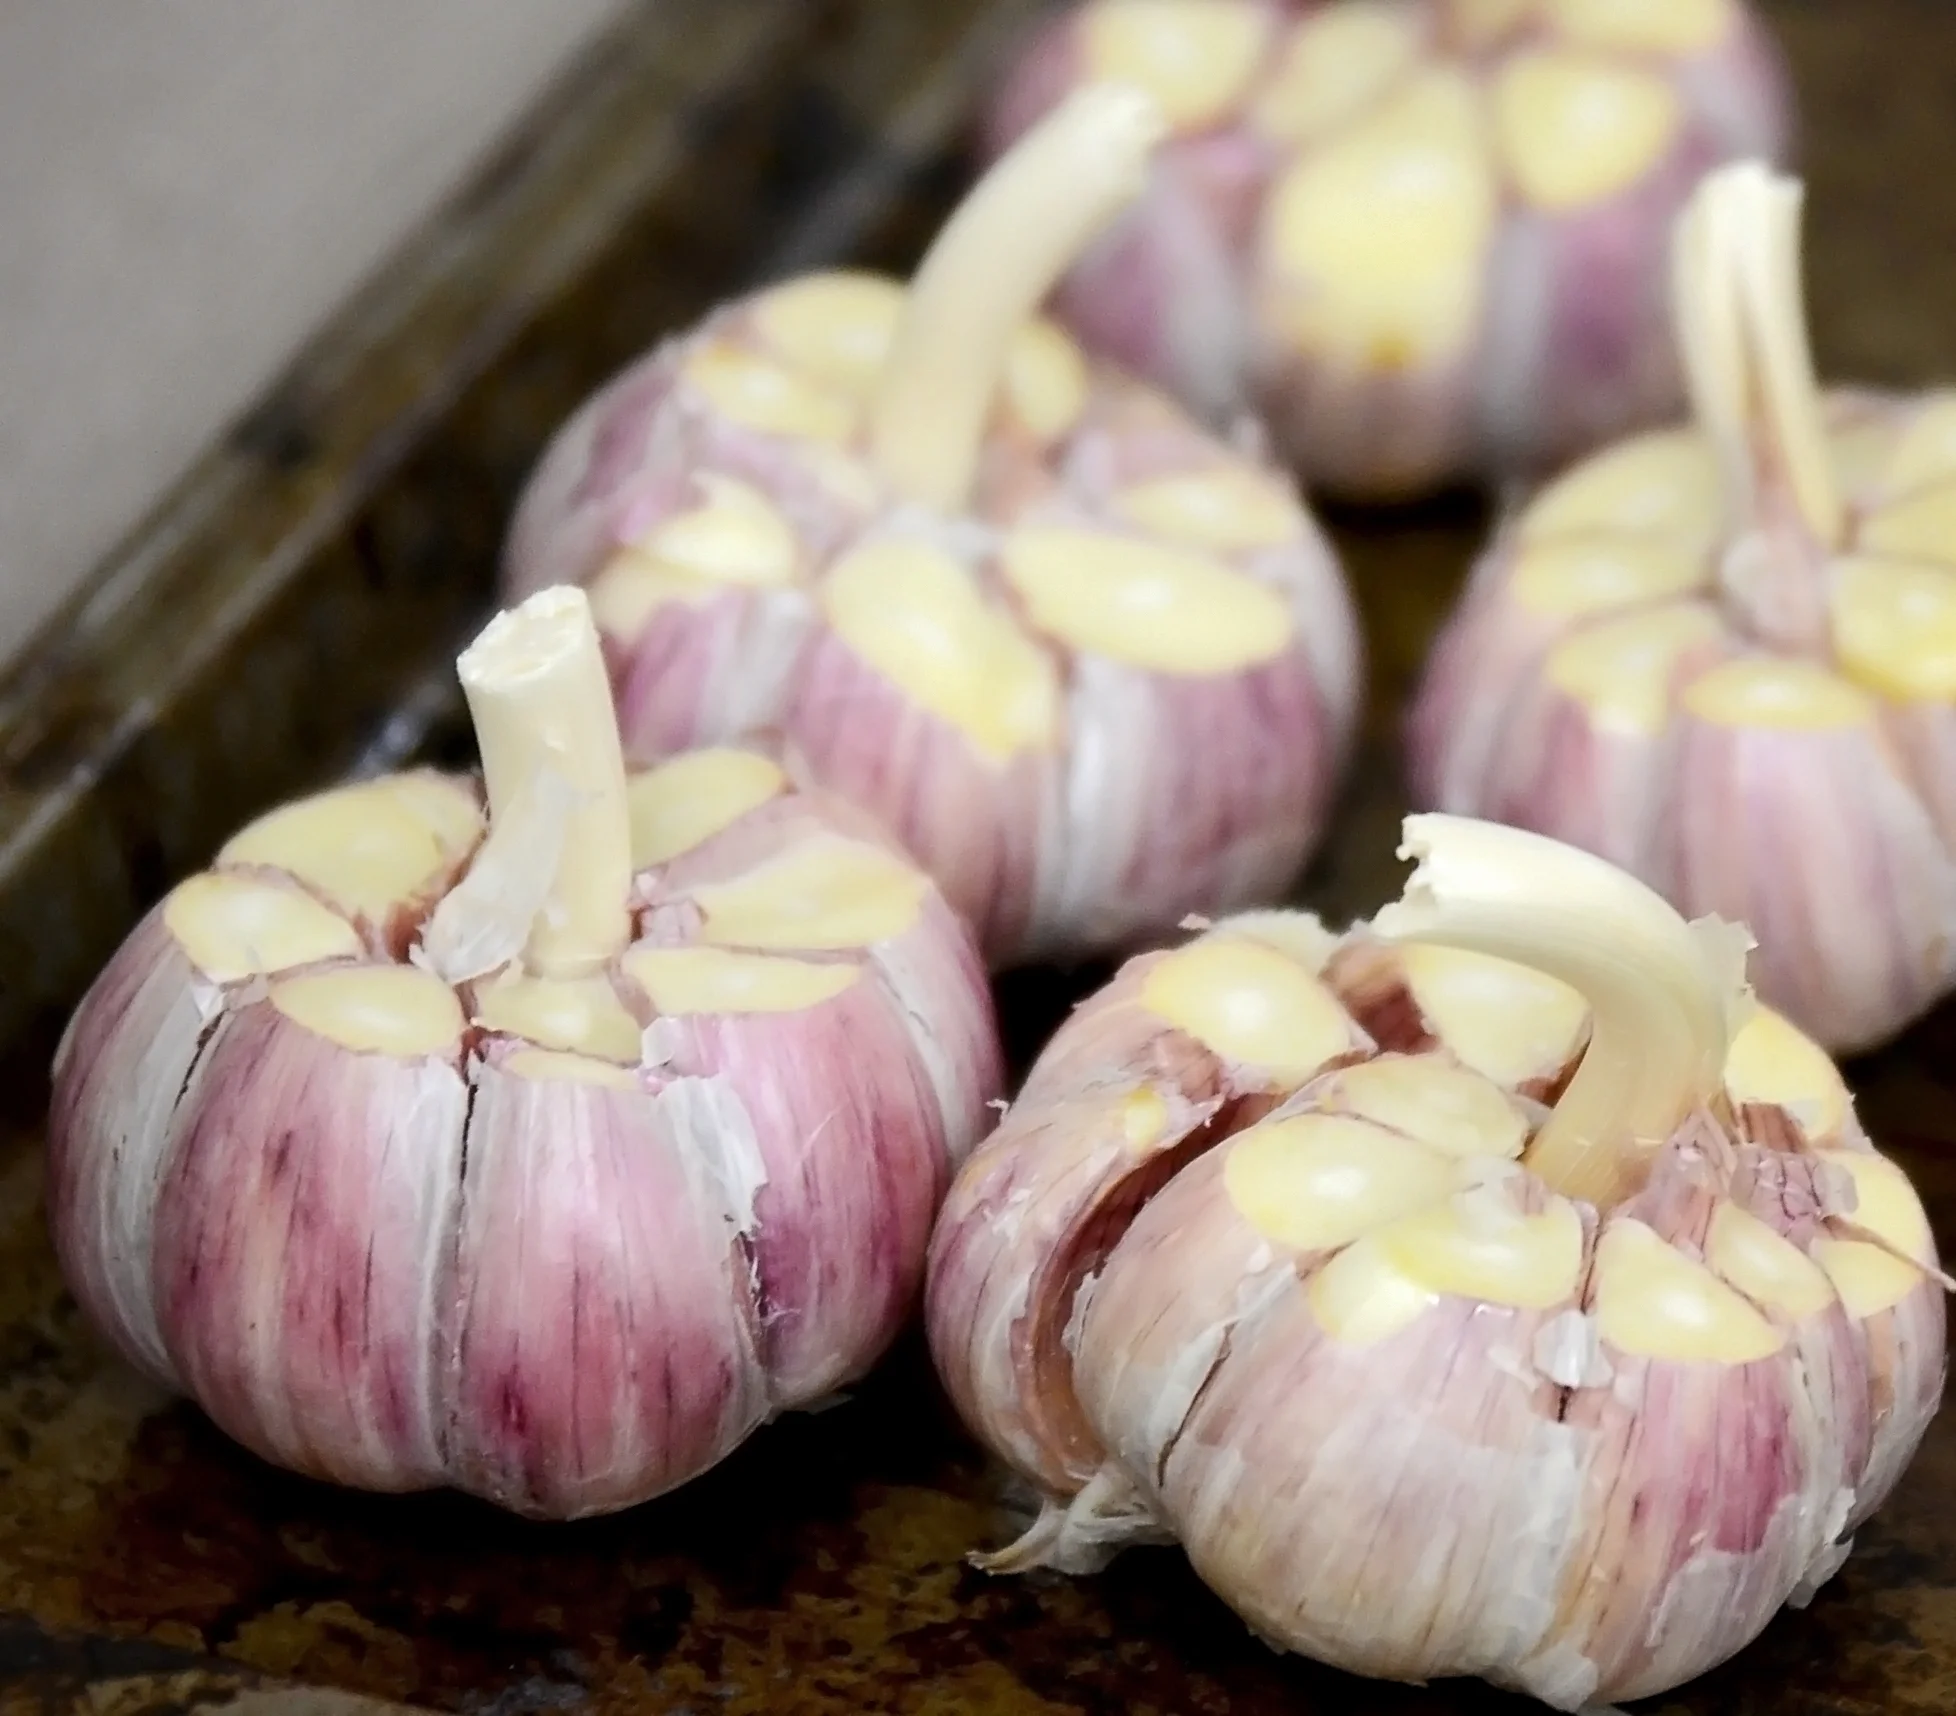
If I have an exceptionally large harvest, I’ll process the heads for storage. This works especially well for hardneck types that might not keep. Cut the tops off the heads to expose a portion of each clove. Arrange the heads on a cookie sheet and drizzle with a little olive oil. Roast the heads at 350°F until soft and caramelized. Allow the heads to cool and store in a ziplock bag in the freezer. To use, defrost whole heads in the microwave for only about 20 seconds, or allow them to come to room temperature on the counter. The heads thaw very quickly. It’s an excellent way to have delicious roasted garlic at your fingertips for recipes or as a spread on fresh, crusty bread.
Garlic’s natural pungency and its ability to accumulate sulfur makes it a valuable companion plant, warding off insect pests and even masking the scent of nearby plants that deer and rabbits may otherwise find tempting. Most garden veggies will benefit from garlic’s proximity, as do roses. Beans, peas, and parsley are exceptions to that rule.
If you’re thinking about letting your garden rest for the winter rather than planting cool-season vegetables, you might want to reconsider for this one spectacular and very easy to grow crop. Try a variety or two, and you’ll be amazed at how delectable homegrown garlic is.
Author: Kat B.

